Intaglio - Summer 2013
I find it rather funny that I started the Printmaking Certificate Program because I was always fascinated with Screen Printing. We were unable to get to it in the Making Multiples class. So that was going to be my focus for the Open Studio. Unfortunately the Screen Printing room was filled with Student Exhibit pieces and was unusable for most of the class. So I decided to focus on Intaglio printing.
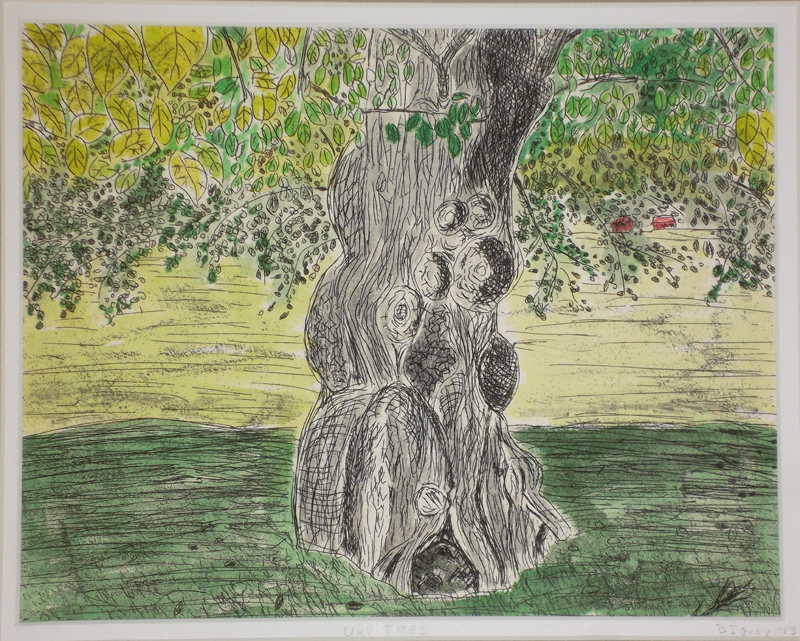
The previous fall I took a trip to the University of Kentucky and on a tour of the campus saw the most amazing tree standing alone near the library. I took several pictures and thought creating an intaglio print of that tree would be really cool.
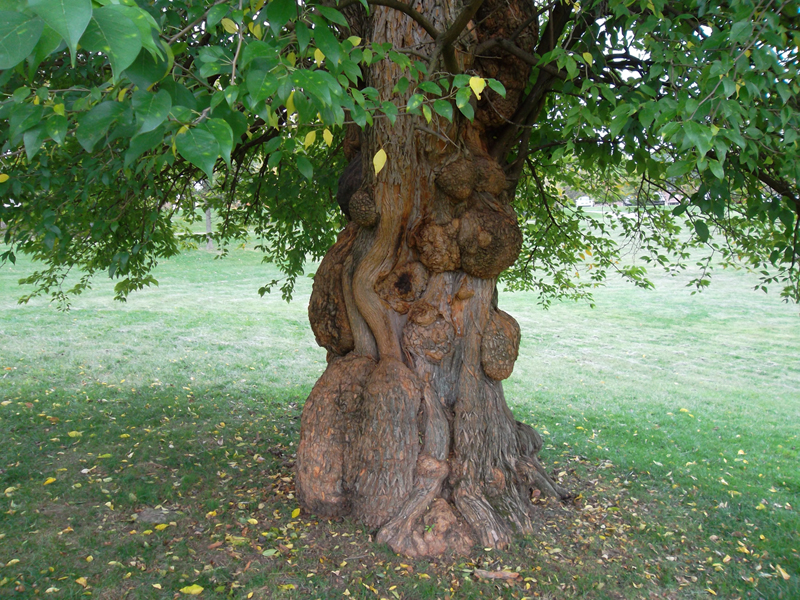
I chose this side, but there are 3 other pictures:
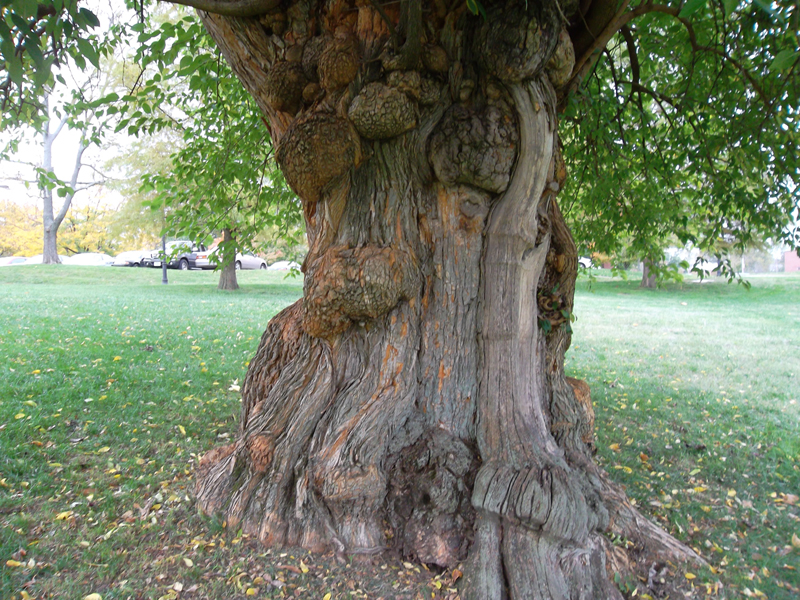
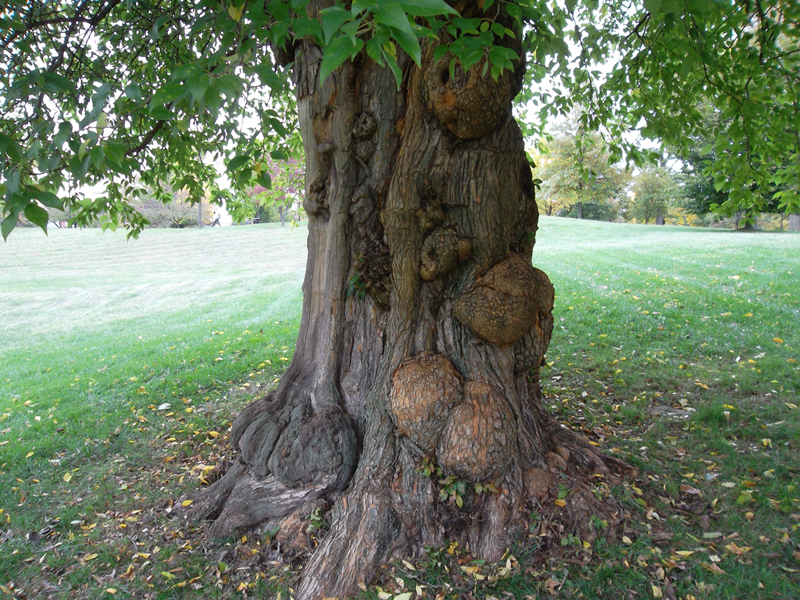
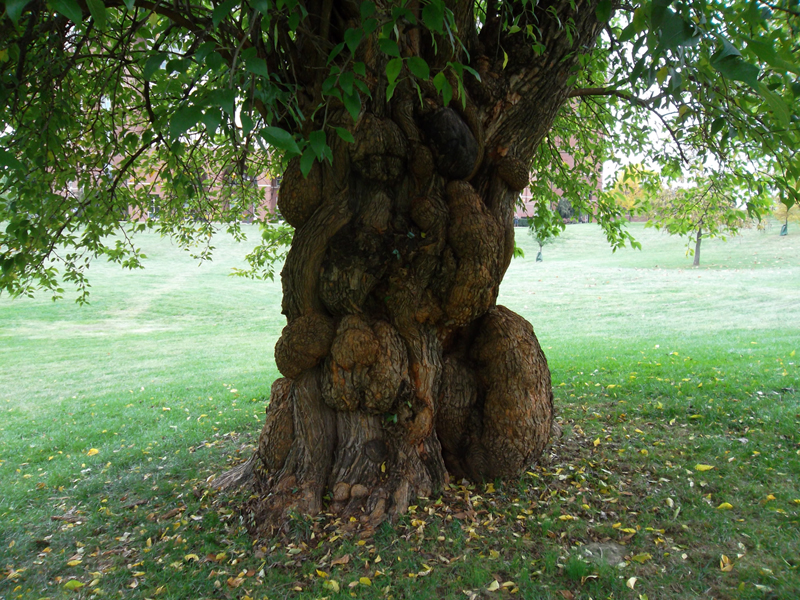
Following the instructions for Intaglio Printing I etched a copper plate, printed it, and the hand painted using water colors to produce this print:
The following are the individual steps that I followed:
Printmaking: Intaglio - Line Etching
1. Materials for preparing Plate: Copper, zinc or Plexiglas -8x10" or larger
2. Etching needle (*blunt the point on one end)
3. scraper
4. burnisher
5. Contact brand paper
6. pencil,
7. tracing paper
8. duct tape
9. Ferric chloride (mordant)
10. hard ground & roller
11. soft ground
12. Ammonia & water,
13. Whiting,
14. SoySolv
15. dish detergent Gloves and apron
Process for preparing plate:
1. Degrease plate — Pour some ammonia mixture on the plate, sprinkle with whiting and rub thoroughly with small cloth. Rinse. Repeat on the other side. Water should flow off plate when clean. Dry the plate.
2. Apply Contact paper to the back side of the plate. To make sure there are no air bubbles, start on one side and roll with a clean brayer. Trim the paper by rubbing the edge with a burnisher.
3. Apply the Liquid Hard Ground to the plate - Turn the hot plate to 250 degrees. Place the copper plate on a sheet of newsprint Apply liquid hard ground in a thin even coat, try to avoid a build up of brush strokes. You want as thin a layer as possible.
4. Place on the hot plate for 2-3 minutes. This will make the surface uniform, shiny and smooth out brush marks.
5. Remove plate from heat and shock under cold running water.
6. Turn off hot plate. (Unless other people are also working)
7. Transfer the image to the plate — Develop composition and determine size and format Do a line drawing on hard paper such as tracing paper or newsprint with a #2 pencil. Lay the drawing on the ground side of the plate and using less pressure run through the press. You can also draw directly on the ground with a china marker or crayon. Remember the image will be reversed when printed.
Well, I thought I had taken at least some pictures, but actually they were for the etching I did in the Making Multiples class. After preparing the plate and applyiing the hard ground. I created an 8x10 inch image using Photshop of the UKY Tree and then traced it on tracing paper and #2 pencil. Next I ran it through the press to transfer the image (reversed) to the copper plate.
I had planned to do several etchings, so for the first etching, using my etching needle, I scratched out the lines that I wanted to bite the deepest.
This is the Additive Method described below:
Etching the plate:
We are'using Ferric Chloride as a mordant. It is a safer etching medium with no fumes. It can still irritate your skin and stain your clothes so wear gloves and an apron. The ferric chloride is in a vertical tank so that molecules of the copper will fall out of the etched lines. Use the chart to determine the desired darkness of lines and how long to bite the plate in the mordant Ten inches of duct tape is firmly attached to the back of the plate and the plate is suspended in the tank.
There are two methods of biting the plate in stages to obtain lines of differing values:
1. Reductive Method: The entire image is drawn through the ground with the etching needle* and the plate is suspended in the mordant After a period of etching, parts of the image are stopped out (covered with stop out varnish). The lines that have been left exposed throughout the etching process will be deepest and print darkest. Those lines that have been stopped out earlier in the process will be shallower and print lighter.
2. Additive Method: A minimal line drawing is drawn through the ground with an etching needle.* The plate is suspended in the Ferric Chloride for a time and then more details are added. The image is created in successive stages of biting and drawing with the needle. The lines drawn in the beginning have been exposed to the mordant longest so they print darkest. The last lines drawn will be the lightest.
Use the blunted end of the needle and scratch only through the ground and not into the plate.
After the plate is etched:
Neutralize the Ferric on the plate first in a Water bath and secondly a Vinegar and salt solution. Repeat 3 to 5 times Water to Vinegar. Otherwise the Ferric will continue to etch and if printed rust stain may transfer to your print.
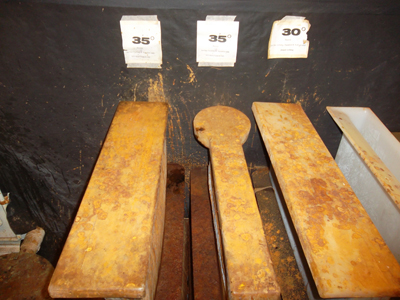
There are 3 acid baths labeled:
- 35 degrees Baumé - Etching, Aquatint - No Soft Ground
- 35 degrees Baumé - Etching, Aquatint - No Soft Ground
- 30 degrees Baumé - Etching, Aquatint, Soft Ground - Slow Etching
The Baumé scale is a measure of a solution's specific gravity, not its concentration. The French chemist Antoine Baumé devised the scale for marking hydrometers. Although the Baumé scale is almost never mentioned in chemistry courses, tradesmen often use it as a convenient way to check solution concentration.
For more information on the chemistry of Ferric Chloride - See
I used Tank #1, I attached a long piece of duct tape to the back of the plate and then to the side of the tank so that it would hang vertically, as the molecules of copper are etched away, they fall to the bottom of the tank.
NOTE: Be careful you piece isn't hanging too deep into the tank, if a portion of the plate is actually sitting in this sludge, it will not etch as well.
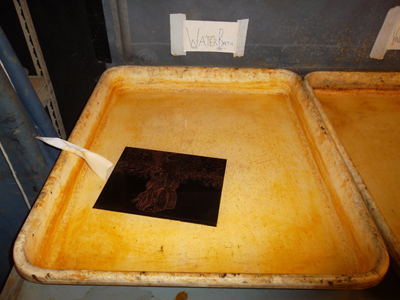
Although, stationary in the picture, normally I am moving the piece around in the water. 3 minutes in the water, followed by 3 minutes in the vinegar.
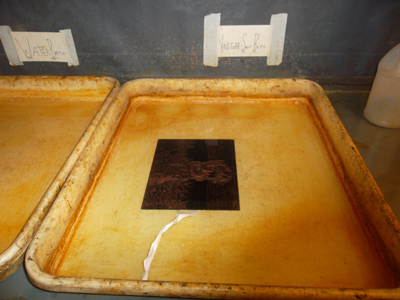
The water/vinegar bath is repeated 3 times.
Using the etching needle to scratch additional lines in the surface. Etch and wash repeatively, until you have created a image that you want to try printing.
Remove Hard Ground with SoySolv and then dish detergent. Remove any Stop Out with alcohol.
Use Ball Hard Ground for second and third line etchings so that you can see the
previously etched lines:
Degrease plate. Lay plate on newsprint on hot plate (250 degrees F). Melt hard ground on plate to cover about 1/3 of surface. Use hard ground roller to roll out a thin even coat of the ground on the plate. Remove from hot plate and continue to roll out the ground to even out marks. Return to the hot plate for 3 to 5 minutes. Remove from hot plate and allow cooling. Turn off hot plate.
When etching is complete remove the contact paper from the back of the plate.
Before printing bevel the plate.
Bevel and polish the edges of your plate using the file, scraper and burnisher.
1. First, file all four corners so that they are rounded.
2. Next, file all four sides.
3. Then laying the plate on a sheet of newsprint on a flat surface at arms length scrape all edges with a hollow scraper. With even pressure and a pull stroke scrape the edges at an angle. Be sure to keep the other hand away from the scraper as you pull it toward you. File all edges a second time to remove all irregularities caused by the scraper. Repeat, alternating the file and scraper until all edges are beveled to the correct angle (45 degrees).
4. Put a couple of drops of oil on the beveled edge and polish with the burnisher until smooth.
5. Debur the edges of roofing copper by pulling the deburring tool toward you along the edge of the plate removing the sharp edge. File corners.
Printing Procedure:
Materials for printing:
1. Printmaking Paper such as Rives BFK, Stonehenge, Copperplate, etc. and newsprint
2. Inks: oil based or Akua Intaglio water based inksModifiers: DS Gel Medium, Easy Wipe (for oil) or Oil Converter (for Akua Intaglio)
3. Mat board cards
4. Tarlatan
5. Phone book Pages T-shirt material Gloves Press
6. SoySolv and dish detergent Water bath and towel
Printing Process:
Preparing the paper;
1. Measure, tear, soak and blot the printmaking paper before printing.
2. Oil based etching inks and Daniel Smith W/S inks require damp paper.
Long soak papers such as BFK can be soaked from 10 up to an hour.
Short soak papers such as Stonehenge should be soaked from 5 to 15 minutes.
3. Akua Intaglio can be used on dry or dampened paper (a quick dip is sufficient).
4. Dry paper will result in more contrast while damp paper will show more tone.
5. After soaking hold the paper over the bath to drain excess water and then blot in a clean towel.
6. Experiment and document results.
Inking the plate:
Oil based ink is mixed with easy wipe or gel medium in an 80% to 20% ratio to begin. The plate may be placed on a sheet of newsprint on the hot plate (150 degrees) for a moment before inking. *
Mix Akua Intaglio ink well and add soy conditioner to achieve desired viscosity.
1. Wearing gloves apply a thin layer of ink to the plate with a smooth square of mat board. Ink the entire plate.
2. Using a tarlatan (formed into a wad with a flat side) and a broad circular motion, gently remove excess ink from the surface of the plate. Refold the tarlatan when it becomes too inky.
3. Start with an inky tarlatan and then switch to a cleaner one.
4. Wipe the surface with a piece of soft newsprint (from a phone book).
5. Do not remove all the ink from the plate, leave a plate tone.
6. Wipe the beveled edges (only) with a piece of T-shirt material.
Printing on the press:
1. Check the pressure of the press for desired setting.
2. Lay a piece of newsprint or a template on the press bed.
3. Place the inked plate on this paper (template) with the ink side up. Take care to place rather than slide the plate into position. Align the damp presoaking paper over the
plate and cover with two sheets of newsprint.
4. Position the blankets and run through the press with one continuous motion.
5. Remove the finished print and place on a drying rack or pin dry or dry in a hard stack until completely dry.
6. Repeat the process, making adjustments until you are satisfied with the results. Complete the edition.
Clean up:
1. Clean your plates with SoySolv (for oil based inks) or vegetable oil (for W/S inks)
and detergent and water.
2. Scrape the inked glass with a putty knife and then with a blade. Next clean with water and a paper towel for W/S inks and vegetable oil or Soy Solv for oil based inks.
3. Simple green works well for a final wipe.
4. All materials with ink are placed in the red metal waste can. Tarlatans and material should be shaken out and hung to dry. Return all supplies and tools to the proper place.
5. Remove plates and templates from press bed. Remove the blankets from underneath the drum (roller). Roll blankets together and place at one end of the press bed. Center the press bed under the drum.
Finished prints should be readied for presentation and be signed and numbered.